
Raise your hand if you’ve gone to wrap a present and have had to untangle the ribbon or flatten out the gift wrap that got creased from where it was being stored. Or maybe you don’t even get this far. Maybe you know that at one point you bought a roll of wrapping paper and some tissue paper but couldn’t begin to tell you which closet you shoved it in a few months ago.
Gift wrap is one of the categories that always seems to surprise people because they truly do not realize the amount that they have until we start pulling it from multiple areas in the house. Hands down, tissue paper always wins for being the largest category! There is rarely emotional attachment to gift wrap, which makes it easy to neglect and is also why it’s usually low on the priority list to organize. For one of our clients, it was the exact opposite.
With an impressive collection of gift wrap and coordinating accoutrements, our client wanted a way to store all of her gift wrap and supplies in a way that made it easy to identify what she had and what she needed to replace, all in an accessible system.
I love any opportunity that I get to design closets. And while I love clothes and shoes, it’s always fun to mix things up and design for a space that has nothing to do with either, like this gift wrap space.
HOW TO CREATE A GIFT WRAP CLOSET
First, we measured the interior of the closet that would become the dedicated gift wrap space so that we knew what dimensions we had to work with.

Then, we categorized all of the contents to identify what we had and what we need to keep in mind for future storage. From there, we mocked up a plan that would maximize the available area and make everything easy to reach and access for our client.

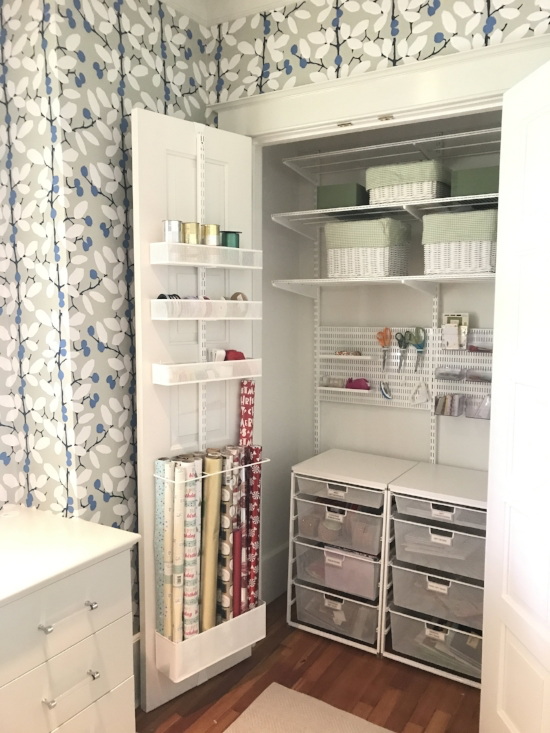
Once the closet was installed, we loaded the contents in (keeping categories separated) and used drawers and baskets to keep each category separated and contained. We made sure to add shelving above the gift wrap unit to make room for gifts to wrap (perfect for those last minute gift situations!) and any extra supplies that may require additional storage down the line.

Regardless of the size of available space that you are working with, I always encourage finding a way to maximize the valuable real estate within that area. For this client, we used the back of the door and then went as vertical with our storage to create a closet that is jam-packed with function but easy to contain and keep up.
BEFORE:

AFTER:

This post comes from the TODAY Parenting Team community, where all members are welcome to post and discuss parenting solutions. Learn more and join us! Because we're all in this together.